_edited.png)
Fabric Hair slides Tutorial
- Sarah Barrett
- Sep 10, 2025
- 2 min read
Updated: Sep 16, 2025
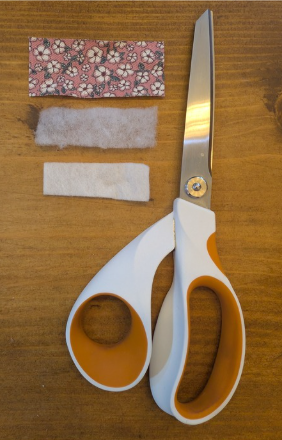
Materials you will need:
Cotton or woven fabric in the print of your choice
Plain felt
Wadding 4oz or 6oz weight
Metal slides 5cm in length
Scissors
Needle
Tape measure
Thread - I would recommend a strong thread like Gutermann’s
Pen ( Ideally a removable one, I like Frixion)
Instructions
Step 1:
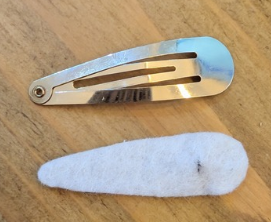
Cut fabric into approximately 3 x 7 cm rectangles, then cut felt and wadding into approximately 2 x 5.5 cm rectangles
Step 2:
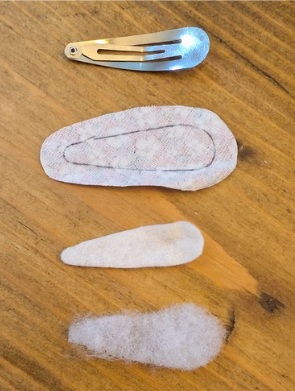
On the wrong side of the fabric draw around the metal clip, then repeat on the felt.

Right side
Wrong side
Trim edges on the fabric piece to leave around 6mm from pen edge.

Cut just inside the pen line on the felt so slightly smaller than the clip.
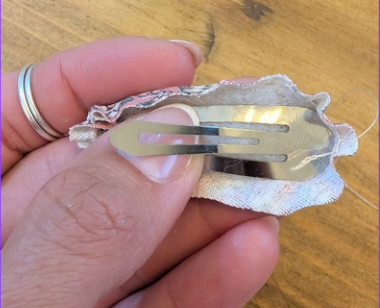
Holding the clip over the wadding, trim around clip.
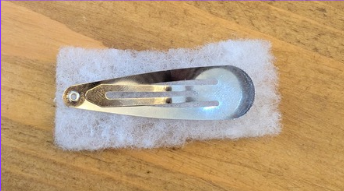
Once cut they should look something like this:
Step 3:
Set up your needle and thread, and do a back stitch to secure the thread around 3mm from raw edge. (If beginner you can add a knot at the end of thread to secure in place).

Start to do a basic running (straight) or basting stitch all around the edge.

Until you reach the starting point.

Place your wadding, along with your open slide on top of the wrong side of the fabric, inside where you have just stitched.
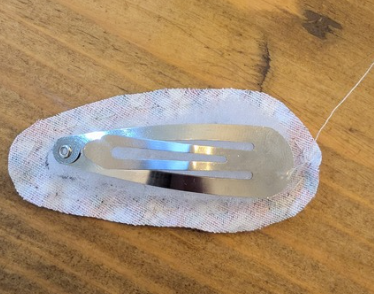
Using your hand to hold all in place, gently pulled the thread taught, so the fabric gathers around the clip, capturing the wadding in-between the clip and fabric (this can be a bit tricky so take your time, don’t pull too tight as you don’t want the tread to snap).
Then backstitch over the fabric to secure in place. I like to pull on the thread to ensure a nice tight fit.

Stitch the edges together, going from one side to the other, ensuring your clip is open, and you stitch under the slide opening (shown in picture).
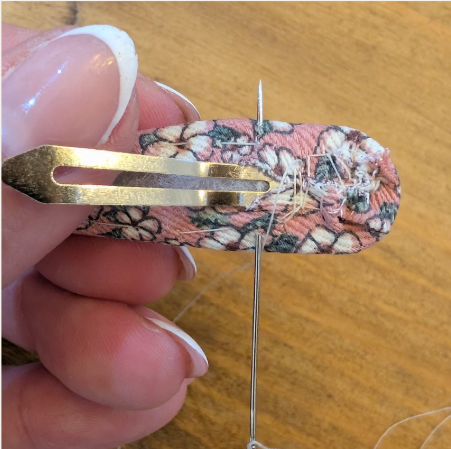
Continue all along the slide, I like to trim off excess fabric at the clip tip, to reduce any bulkiness, when stitching over this section, ensure to keep your tension tight.

Once you have stitch all edges together, finish off the stitches by, simply make a loop into the last stitch you made and draw the needle through it. When you pull tightly, you'll make a knot that secures the stitch. I like to do this 3 times. Keep the thread attached, as you will use this to attach the felt in the next step.
Step 4:
Mark on the felt, where the hair clip joins when open and cut a small slit.
Put the felt then onto the slide, covering all raw edges. I personally like to use a whip stitch then to secure the felt in place, however you can use a hot glue gun.
If stitching, use the thread that you left when sewing the fabric onto the hair clip, and work your way around the edge with a whip stitch with the stitches roughly 2-3mm apart.

Step 5:
Enjoy using your hair clips. Well done for getting this far and completing them.
Follow me @savy_and _elle on Instagram for more helpful tips!
Thanks Sarah x


Comments